
0 of 8 lessons completed · 0% complete
How to Steam Silky Milk
Glossy microfoam comes from adding a little air while milk is cold, then integrating it with a whirlpool.
By KAVOVOUpdated 7 minutes read
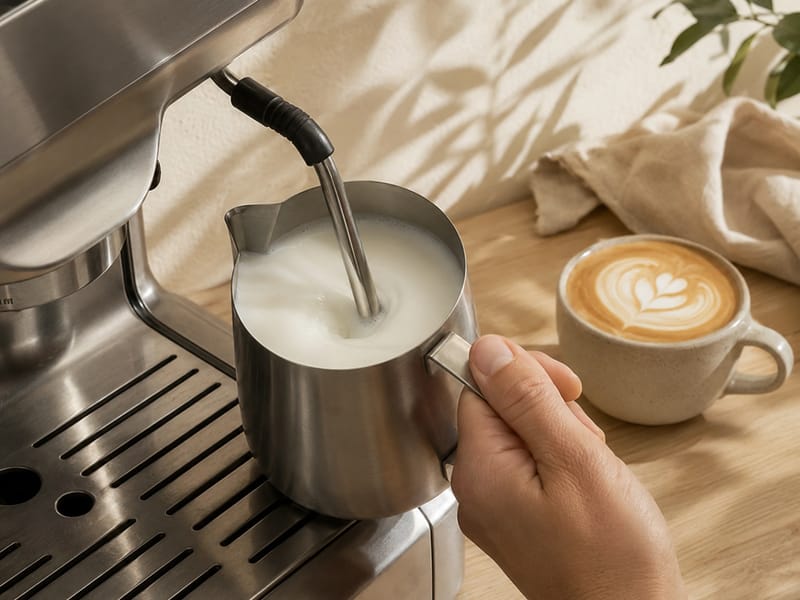
The short answer
Silky milk is made in two stages:
- Add air: keep the steam tip just at the surface for the first few seconds so small amounts of air enter the milk.
- Texture and heat: raise the pitcher slightly so the tip sits just below the surface and position it off-centre to create a whirlpool.
Stop around 55–65°C, wipe and purge the wand immediately, then swirl the pitcher until the milk looks glossy and pours like wet paint.
Start with the right amount of cold milk
Use a clean stainless-steel pitcher and cold milk. Cold milk gives you more time to add air and build texture before it becomes too hot.
Choose a pitcher that leaves room for expansion. For one small milk drink, a 350 ml pitcher is usually practical. Fill to around the bottom of the spout or use the quantity recommended for your pitcher and machine. Too little milk is difficult to control; too much can overflow before it reaches the right texture.
Whole dairy milk is generally forgiving because its proteins help stabilise fine bubbles and its fat gives a rounded texture. Plant drinks vary widely. A “barista” version is usually formulated to steam more reliably, but it may need slightly less heat.
Purge before steaming
Point the wand over the drip tray and open the steam briefly to clear condensed water. Close it before moving the pitcher into position.
This prevents a splash of water entering the milk and confirms that the wand is producing dry steam.
The wand becomes extremely hot. Hold the pitcher by its handle and keep fingers away from the metal tip and tube.
Position the steam tip
Place the tip just below the milk surface and slightly off-centre—not against the wall and not directly in the middle. Tilt the pitcher only as much as needed to help the milk rotate.
Turn the steam on fully. Weak, partially opened steam can make control harder and may produce larger bubbles on machines designed to operate at full power.
Stage 1: add air
Lower the pitcher a few millimetres until the tip sits at the surface. You should hear a soft paper-tearing or gentle kissing sound.
- Loud spluttering means the tip is too high and is pulling in large bubbles.
- Complete silence at the beginning means the tip is too deep and little air is entering.
- A steady scream can mean the milk is not rotating or the tip position is wrong.
For a flat white or latte, add a small amount of air. For a cappuccino, add a little more. The milk should expand gradually, not erupt into soap foam.
Finish adding air while the pitcher still feels cool to lukewarm. Once the milk is warm, new bubbles are harder to integrate smoothly.
Stage 2: create the whirlpool
Raise the pitcher slightly so the tip moves just beneath the surface. Keep it off-centre and adjust the angle until the entire volume of milk rotates.
The whirlpool folds the added air into the liquid and breaks large bubbles into finer ones. The surface should become smooth and glossy, without a separate cap of stiff foam.
If the milk rotates but no air was added at the start, it will be hot and thin. If plenty of air was added but the milk never rotates, it will separate into liquid and dry foam.
Know when to stop
A thermometer gives the most repeatable result. Aim roughly for 55–65°C, depending on the milk and your preference. Milk much hotter than about 70°C tends to lose sweetness, develop a cooked flavour and become less pleasant to texture.
Without a thermometer, stop when the base of the pitcher becomes too hot to hold comfortably for more than a brief moment. This touch method is approximate, so use a thermometer while learning.
Turn off the steam before removing the wand from the milk. Otherwise it will spray hot milk across the counter and possibly introduce your ceiling to cappuccino.
Finish the texture
Immediately wipe the wand with a dedicated damp cloth and purge it over the drip tray.
Tap the pitcher once or twice only if visible large bubbles remain. Swirl firmly until the milk and foam become one glossy liquid. Do not leave it standing while you reorganise the kitchen; steamed milk separates quickly.
Pour as soon as possible. Begin higher to mix milk with espresso, then bring the spout close to the surface when you want the white microfoam to appear.
Troubleshooting
| Problem | Likely cause | Fix |
|---|---|---|
| Large bubbles | Tip too high or air added too aggressively | Keep the tip closer to the surface and use a gentler sound |
| Hot milk with no foam | Tip stayed too deep | Add air during the first few seconds |
| Dry foam sitting on liquid | Too much air or no whirlpool | Add less air and establish rotation earlier |
| Milk screams | Poor tip position or weak circulation | Move the tip slightly off-centre and find the whirlpool |
| Texture looks good but will not pour | Milk stood too long | Swirl again and pour immediately |
| Plant milk splits | Too hot, incompatible drink or very acidic espresso | Use a barista version and stop at a lower temperature |
Try this today
Practise with the same pitcher and same milk quantity three times. Record when you stop adding air and the final temperature. Pour each batch into a clear glass: evenly textured milk should remain integrated rather than forming a thick foam layer on top.
Key takeaway
Add a controlled amount of air while the milk is cold, then use a whirlpool to integrate it as the milk heats. Stop before it becomes too hot, clean the wand immediately and pour while the texture is glossy.
Finished this lesson?
0 of 8 lessons completed · 0% complete